Wallpaper and Welcome


Sabiha at http://sabsminiinteriors.blogspot.com/. I just love your miniatures. They are always very styled and beautiful.

and Dora at http://lasminiaturasdora.blogspot.com/. I'll visit your blog soon to take a longer look, but first impression (your cabinet) Wow!


Over here I put the wallpaper on the livingroom walls.


I've put a cabinet I made in front of it, because I wanted to see how it will look. Can't wait to start with the floors! Just have to go to the store to buy some new wood.


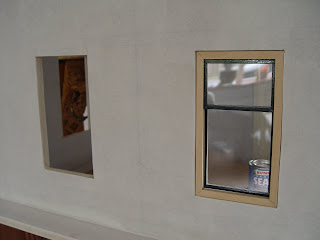
Haha, thought this was a funny shot, it is my 1:1 cabinet (the lionhead with ring) through my 1:12 window.
groetjes evelien
Welcome new followers!!

First Kathi at
http://beautifulminiblessings.blogspot.com/ (beautiful mini's and Fiasco is a sweety ;) )
Rosanna at
http://lastanzadigiuggiola.blogspot.com/ (just adore your needlework!)
and last but not least Marleen at
http://mamamini.punt.nl/ (lots of brocante and great tutorials!)


I'm planning the interior of my dollhouse. I know the outside isn't even finished yet, but a girls got to decorate right? ;)
So I found a great color for the livingroom walls, but it doesn't look good on the MDF although I painted it with gesso first. So now I got some cheap very blue wallpaper (1:1) with a nice small pattern and painted that twice. Much better! Can't wait to see it on the walls!!


I also tried some floors made with "kantenband". I don't know the english word, but it's a wooden-like strip that you iron on the sawside of (for example) a shelf to finish it.

It doesn't work so good, but at least I tried it. The floors will be the same color, but then in real wood.

groetjes Evelien

electric boogy

I've started making the window frames in my house. I've made these myself because I wanted the windows to be like the original house.


Look they work!
It isn't as hard as it may seem. I've glued together some different sizes of wood so there is an opening were the window fits very tightly. Now it stays up when you move it.
Only the sides are like this. The rest is one piece. Then you use your mitre box and a tool to glue the frames rectangular, I use Lego for this. The glass in the windows is from a Ikea photo-frame named Ram . I read this tip on the internet and it works very good. It's plexiglass so you can cut it easily.
I also put in the electricity. I had to mill (is that how it's called?) for this for the first time, very exciting to try this!


And now we have light!! So I can finish the rooms with wallpaper and flooring if I want. I used 4 outlets in every room so I can choose my lamps later on.
groetjes evelien!


Photochallenge

As I said in my latest blog I've been tagged! I got this challenge from Debby (http://petitpunt.blogspot.com/) and Shannon (http://shannonsminiblog.blogspot.com/)

The rules are:

1. open the 4th file where you store your photos...
2. pick out the 4th photo & publish it to your blog...
3. explain a bit about it...
4. pass this challenge to 4 other blogs


This picture is from a dollhouseclub we had for a while. Unfortunately planning to meet was a little difficult, so the club doesn't excist anymore, but we had a great time.
Here you see a plantstand I made to learn the others how to solder. It's not a great picture, but it was the fourth!

The people I like to pass this challenge to are:

Minna at http://minnasdollhouses.blogspot.com/
Katy at http://lasminisdekaty.blogspot.com/
Minimaker at http://creatingdollhouseminiatures.blogspot.com/
Sofia at http://aminhacasaemminiatura.blogs.sapo.pt/

Have fun!

groetjes Evelien


Welcome new followers Maija at http://iidasanttu.blogspot.com/ and Sonia at http://minitink.blogspot.com/. I hope you'll like it here!

This next video was sent to me by my mother. She knows how much I like miniatures and that my boyfriends hobby is keeping birds (we have a big voliere in the garden, so nice!) In this video it all comes together, cool!! It's really funny too...


Tomorrow I'll post my picture for the photochallenge. I've been tagged too!


See ya,


groetjes Evelien


Good Start

Finally I could start putting the first pieces of my dollhouse together! I started in December by converting the real house measurings to 1:12. So it's been a long time untill I could start this part. But patience gives the best results they say, so I take my time!

From pre-cut MDF to something that starts to look like a house:


with the dividing walls of the ground floor in place


the ceiling/second floor in place


It's huge and as you can see my birdies have the best sight ;) I only have to get some wheeled supports so I can access everything easy. Later on we will look for a different cupboard for our living room, because the one we have isn't very practical and also to make room for the dollhouse. So building a dollhouse can change a lot in your 1:1 house as well!

groetjes ,

Evelien

15 Followers!


I love the things you crochet!!


You're well known in the miniature (blog)world I think! And for good reason!


I see you also recently started your blog, good luck!


Shannonconway, I believe you don't have a blog yet?